Friday, February 6, 2015

Oracle Key Vault in an Active Data Guard Environment

In this post I will show how to use Oracle Key Vault server to store a shared virtual wallet for Oracle Database primary and standby server. Oracle Key Vault is a centralized key store that provides key life cycle management, alerts (e.g. key expiration), reports, and other administrative functions.

By default the Master Encryption Key that is used for Transparent Data Encryption is stored in a software wallet on the file system of the database server. Problems you might have with wallets on a file system in large TDE deployments are
- user errors like forgotten password,
- skipped key rotations,
- accidental deletion of wallets
- etc.

I'll start to set up Transparent Data Encryption (TDE) with a software wallet on the file system. Eventually I will migrate that wallet into Oracle Key Vault.

Having the Master Encryption Keys for Transparent Data Encryption stored in Key Vault makes it particularly easy to perform re-key operations in an Active Data Guard environment. There's no need to manually copy the wallet from the primary to the standby server anymore as you will see in the Test at the end of this blog post.

For more information about Oracle Key Vault, click here.

Environment
The environment I used consists of the following:

  • Oracle Database 11g Enterprise Edition Release 2; 11.2.0.4 on the primary database and the standby database. 
  • Physical Data Guard is already configured.
  • Primary database server name is dg1 with a database name dg1.
  • Standby database server name is dg2 with a database name dg2.
  • Oracle Key Vault server is version 12.1.0.0.0.

It is important to do the steps in the right order on the primary and standby server.


Configure Transparent Data Encryption

Create Wallet and Master Encryption Key


On the Standby Serer


Create the directory in which the wallet will be created.


[oracle@dg2 ~]$ mkdir /u01/app/oracle/admin/dg2/wallet


Add parameter to the $ORACLE_HOME/network/admin/sqlnet.ora file.


ENCRYPTION_WALLET_LOCATION=
 (SOURCE=
  (METHOD=FILE)
   (METHOD_DATA=
    (DIRECTORY=/u01/app/oracle/admin/dg2/wallet)))


On the Primary Server


Create a directory in which the wallet will be created.


[oracle@dg1 ~]$ mkdir /u01/app/oracle/admin/dg1/wallet


Add parameter to $ORACLE_HOME/network/admin/sqlnet.ora file.


ENCRYPTION_WALLET_LOCATION=
 (SOURCE=
  (METHOD=FILE)
   (METHOD_DATA=
    (DIRECTORY=/u01/app/oracle/admin/dg1/wallet)))


Create the Wallet and the Master Encryption Key.


SQL> alter system set encryption key identified by "Oracle_123";

System altered.


Copy the wallet to the standby server.


[oracle@dg1 ~]$ scp /u01/app/oracle/admin/dg1/wallet/ewallet.p12 oracle@dg2:/u01/app/oracle/admin/dg2/wallet
oracle@dg2's password: 
ewallet.p12                        100% 2845     2.8KB/s   00:00


On the Standby Server


Open the wallet on the standby server.


SQL> alter system set encryption wallet open identified by "Oracle_123";

System altered.


Create some Encrypted Sample Data


Create encrypted tablespace emp.


SQL> CREATE TABLESPACE "EMP" DATAFILE '/u01/app/oracle/oradata/dg1/emp_enc01.dbf' SIZE 10M LOGGING EXTENT MANAGEMENT LOCAL SEGMENT SPACE MANAGEMENT AUTO DEFAULT STORAGE ( ENCRYPT ) ENCRYPTION USING 'AES256';

Tablespace created.


Create user emp.


SQL> CREATE USER "EMP" PROFILE "DEFAULT" IDENTIFIED BY "Oracle123" DEFAULT TABLESPACE "EMP" TEMPORARY TABLESPACE "TEMP" QUOTA UNLIMITED ON "EMP";

User created.


Create table employees.


SQL> create table emp.employees (
eid number,
firstname varchar2(32),
lastname varchar2(32),
dob varchar2(32)
) tablespace emp; 

Table created.


Create some sample data.


SQL> insert into emp.employees values (1, 'John','Doe','28/08/1978');
insert into emp.employees values (2, 'Marie','Curie','15/06/1956');
insert into emp.employees values (3, 'Mario','Mann','14/01/1992');
insert into emp.employees values (4, 'Ted','Turner','30/09/1964');
insert into emp.employees values (5, 'Ben','Brunell','30/09/1964');
commit;
1 row created.

SQL> 
1 row created.

SQL> 
1 row created.

SQL> 
1 row created.

SQL> 
1 row created.

SQL> 

Commit complete.

Perform log switch.


SQL> alter system switch logfile;

System altered.


On the Standby Server


Query encrypted data.


SQL> column firstname format a10 word_wrapped
SQL> column lastname format a10 word_wrapped
SQL> column dob format a12 word_wrapped
SQL> select * from emp.employees;

       EID FIRSTNAME  LASTNAME   DOB         
---------- ---------- ---------- ------------
         1 John       Doe        28/08/1978  
         2 Marie      Curie      15/06/1956  
         3 Mario      Mann       14/01/1992  
         4 Ted        Turner     30/09/1964  
         5 Ben        Brunell    30/09/1964  


Configure Endpoints and Install Key Vault Clients

Add Enpoints in Key Vault


Create Virtual Wallet


Connect to the Key Vault management console:
https://192.168.56.7

Log in as keyadmin.


Click on the Keys & Wallets tab.

On the wallets page, click Create.

Enter the name of the wallet and, optionally, a description.

Click Save.


Add Endpoint for Primary Database


Select the Endpoints tab.

Click Add on the Endpoints page.

On the Register Endpoint page, enter the metadata for the new endpoint.

Click Register.


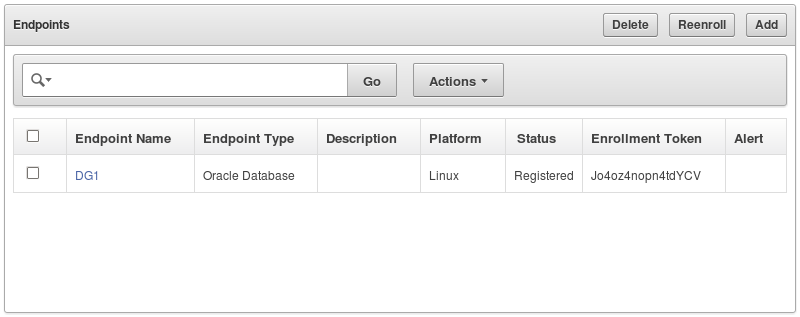
When the Endpoint page appears, copy the Enrollment Token for DG1.

Click the Link DG1.


Assign DG_WALLET as the Default Wallet.

Click Save.


Add Endpoint for Standby Database


 Select the Endpoints tab.

Click Add on the Endpoints page.

On the Register Endpoint page, enter the metadata for the new endpoint.

Click Register.


When the Endpoint page appears, copy the Enrollment Token for DG1.

Click the Link DG1.


Assign DG_WALLET as the Default Wallet.

Click Save.


Enroll Endpoint and install Oracle Key Vault Client


On the Primary Server


Connect to the Key Vault management console:
https://192.168.56.7

Under the login area, click on the Endpoint Enrollment and Software Download link.


The Enrollment page appears.

Enter the Enrollment Token for DG1 and press Submit Token.

Click Enroll to complete process.

Save the okvclient.jar to e.g. /home/oracle.


On the primary server, navigate to /home/oracle. Run java command to install okvclient.jar.
When asked for a password, press <enter> for auto-login.


[oracle@dg1 ~]$ java -jar okvclient.jar -d /home/oracle/okvutil -v
Detected JAVA_HOME: /usr/java/jdk1.7.0_71/jre
Enter new Key Vault endpoint password (<enter> for auto-login): 
Oracle Key Vault endpoint software installed successfully.


Run root.sh script to copy liborapkcs.so (located in the lib directory).


[oracle@dg1 ~]$ sudo /home/oracle/okvutil/bin/root.sh 
Creating directory: /opt/oracle/extapi/64/hsm/oracle/1.0.0/
Copying PKCS library to /opt/oracle/extapi/64/hsm/oracle/1.0.0/
Setting PKCS library file permissions
Installation successful.


On the Standby Server


Connect to the Key Vault management console:
https://192.168.56.7

Under the login area, click on the Endpoint Enrollment and Software Download link.


The Enrollment page appears.

Enter the Enrollment Token for DG2 and press Submit Token.

Click Enroll to complete process.

Save the okvclient.jar to e.g. /home/oracle.


On the standby server, navigate to /home/oracle. Run java command to install okvclient.jar.
When asked for a password, press <enter> for auto-login.


[oracle@dg1 ~]$ java -jar okvclient.jar -d /home/oracle/okvutil -v
Detected JAVA_HOME: /usr/java/jdk1.7.0_71/jre
Enter new Key Vault endpoint password (<enter> for auto-login): 
Oracle Key Vault endpoint software installed successfully.


Run root.sh script to copy liborapkcs.so (located in the lib directory).


[oracle@dg1 ~]$ sudo /home/oracle/okvutil/bin/root.sh 
Creating directory: /opt/oracle/extapi/64/hsm/oracle/1.0.0/
Copying PKCS library to /opt/oracle/extapi/64/hsm/oracle/1.0.0/
Setting PKCS library file permissions
Installation successful.


Migrate Wallet


On the Standby Server


Close wallet on the standby server.


SQL> alter system set encryption wallet close identified by "Oracle_123";

System altered.


Modify parameter in the $ORACLE_HOME/network/admin/sqlnet.ora file.


ENCRYPTION_WALLET_LOCATION=
 (SOURCE=
  (METHOD=HSM))


Open wallet.


SQL> alter system set encryption wallet open identified by "null";

System altered.


On the Primary Server


Close wallet (In 12c wallet does not have to be closed).


SQL> alter system set encryption wallet close identified by "Oracle_123";

System altered.


Upload existing wallet into Key Vault.


[oracle@dg1 ~]$ /home/oracle/okvutil/bin/okvutil upload -l /u01/app/oracle/admin/dg1/wallet -t WALLET -g DG_WALLET
Enter source wallet password: 
Upload succeeded


Modify parameter in the $ORACLE_HOME/network/admin/sqlnet.ora file.


ENCRYPTION_WALLET_LOCATION=
 (SOURCE=
  (METHOD=HSM)
   (METHOD_DATA=
    (DIRECTORY=/u01/app/oracle/admin/dg1/wallet)))


Check status of the wallet in v$encryption_wallet.


SQL> select wrl_type, status from v$encryption_wallet;

WRL_TYPE             STATUS
-------------------- ------------------
File                 CLOSED
HSM                  CLOSED


Migrate wallet.


SQL> alter system set encryption key identified by "null" migrate using "Oracle_123";

System altered.


Check status of the wallet in v$encryption_wallet.


SQL> select wrl_type, status from v$encryption_wallet;

WRL_TYPE             STATUS
-------------------- ------------------
File                 CLOSED
HSM                  OPEN


Test

On the Primary Server


Rekey the Master Encryption Key on the primary database.


SQL> alter system set encryption key identified by "null";

System altered.


Enter new record into emp.employees.


SQL> insert into emp.employees values (6, 'Alice','Bond','12/04/1954');

1 row created.

SQL> commit;

Commit complete.


Switch logfile.


SQL> alter system switch logfile;

System altered.


On the Standby Server


Query table emp.employees.


SQL> column firstname format a10 word_wrapped
SQL> column lastname format a10 word_wrapped
SQL> column dob format a12 word_wrapped
SQL> select * from emp.employees;

       EID FIRSTNAME  LASTNAME   DOB         
---------- ---------- ---------- ------------
         1 John       Doe        28/08/1978  
         2 Marie      Curie      15/06/1956  
         3 Mario      Mann       14/01/1992  
         4 Ted        Turner     30/09/1964  
         5 Ben        Brunell    30/09/1964
         6 Alice      Bond       12/04/1954


As you can see, encrypted data is readable on the standby database without manually copying the wallet across.

That's it. It's a long post but the process is fairly straightforward I believe.


Monday, June 2, 2014

ORA-28293 when using Kerberos Authentication for EUS using OUD proxy with User entries being in Active Directory (solved)

Hi guys,

I configured Enterprise User Security with user entries being in AD, and connection between EUS/ Oracle Database been made using OUD proxy using kerberos authentication.

I mainly followed these Oracle Support Documents (https://support.oracle.com):
- EUS AD Integration Using OUD Proxy (Doc ID 1571196.1)
- Configuring ASO Kerberos Authentication with a Microsoft Windows 2008 R2 Active Directory KDC (Doc ID 1304004.1)

However, when I tried to log in to the database I got the following error:

-------------------- 8< --------------------

[oracle@db ~]$ okinit -e 23 rgreen

Kerberos Utilities for Linux: Version 11.2.0.4.0 - Production on 03-JAN-2014 13:58:25

Copyright (c) 1996, 2013 Oracle.  All rights reserved.

Password for rgreen@EXAMPLE.COM:
[oracle@db ~]$ sqlplus /@orcl

SQL*Plus: Release 11.2.0.4.0 Production on Fri Jan 3 14:06:22 2014

Copyright (c) 1982, 2013, Oracle.  All rights reserved.

ERROR:
ORA-28293: No matched Kerberos Principal found in any user entry

-------------------- 8< --------------------

The OUD access log tells what went wrong:

-------------------- 8< --------------------

[18/Dec/2013:20:56:25 +0100] CONNECT conn=77 from=127.0.0.1:37607 to=127.0.0.1:51636 protocol=LDAPS
[18/Dec/2013:20:56:25 +0100] BIND REQ conn=77 op=0 msgID=1 type=SASL mechanism=DIGEST-MD5 dn="cn=orcl,cn=oraclecontext,dc=example,dc=com"
[18/Dec/2013:20:56:25 +0100] BIND RES conn=77 op=0 msgID=1 result=14 etime=0
[18/Dec/2013:20:56:25 +0100] BIND REQ conn=77 op=1 msgID=2 type=SASL mechanism=DIGEST-MD5 dn="cn=orcl,cn=oraclecontext,dc=example,dc=com"
[18/Dec/2013:20:56:25 +0100] BIND RES conn=77 op=1 msgID=2 result=0 authDN="cn=orcl,cn=OracleContext,dc=example,dc=com" etime=2
[18/Dec/2013:20:56:25 +0100] SEARCH REQ conn=77 op=2 msgID=3 base="cn=OracleDBSecurity,cn=Products,cn=OracleContext,dc=example,dc=com" scope=one filter="(&(objectclass=orcldbenterprisedomain_82)(uniqueMember=cn=orcl,cn=OracleContext,dc=example,dc=com))" attrs="orclDBAuthTypes,dn"
[18/Dec/2013:20:56:25 +0100] SEARCH RES conn=77 op=2 msgID=3 result=0 nentries=1 etime=2
[18/Dec/2013:20:56:25 +0100] SEARCH REQ conn=77 op=3 msgID=4 base="cn=Common,cn=Products,cn=OracleContext,dc=example,dc=com" scope=base filter="(objectclass=*)" attrs="ALL"
[18/Dec/2013:20:56:25 +0100] SEARCH RES conn=77 op=3 msgID=4 result=0 nentries=1 etime=4
[18/Dec/2013:20:56:25 +0100] SEARCH REQ conn=77 op=4 msgID=5 base="cn=Users,dc=example,dc=com" scope=sub filter="(krbPrincipalName=rgreen@EXAMPLE.COM)" attrs="dn"
[18/Dec/2013:20:56:25 +0100] SEARCH PROXY_REQ conn=77 op=4 msgID=5 s_conn=21 scope="sub" s_msgid=34 base="cn=Users,dc=example,dc=com" s_credmode=use-client-identity filter="(krbPrincipalName=rgreen@EXAMPLE.COM)"
[18/Dec/2013:20:56:25 +0100] SEARCH PROXY_RES conn=77 op=4 msgID=5 result=0 s_conn=21 s_msgid=34 etime=1 authzDN=cn=orcl,cn=OracleContext,dc=example,dc=com nentries=0
[18/Dec/2013:20:56:25 +0100] SEARCH RES conn=77 op=4 msgID=5 result=0 nentries=0 etime=1
[18/Dec/2013:20:57:25 +0100] UNBIND REQ conn=77 op=5 msgID=6
[18/Dec/2013:20:57:25 +0100] DISCONNECT conn=77 reason="Client Disconnect"

-------------------- 8< --------------------

So the database searches for krbPrincipalName, but userPrincipalName is the standard attribute in AD.

To fix this the attribute orclCommonKrbPrincipalAttribute in the EUS configuration has to be changed from krbPrincipalName to userPrincipalName. Although this attribute is documented here it took me a while to find it.

To change the value of the krbPrincipalName proceed as follows:

1) Create file ldapmodify.ldif:
dn: cn=Common,cn=Products,cn=OracleContext,dc=example,dc=com
changetype: modify 
replace: orclCommonKrbPrincipalAttribute 
orclCommonKrbPrincipalAttribute: userPrincipalName

2) Run the ldapmodify command:
ldapmodify -h db.example.com -p 51389 -D "cn=Directory Manager" -j /tmp/password.txt -v -f ldapmodify.ldif

Of course, domain, hostname etc. must be replaced.

Regards,
Roy

Sunday, June 1, 2014

Oracle Audit Vault Server 12.1.2 Installation

Oracle has merged the two Oracle Audit Vault and Oracle Database Firewall into the new Oracle Audit Vault and Database Firewall. Audit Vault and Database Firewall installation comprises of installing Audit Vault first and then Database Firewall. It is possible to use only one part of the product, but you will have to install the Audit Vault Server in any case as this is also the repository for the Database Firewall. This post deals with Audit Vault Server installation only. 

For more information about the product click here and for the official product documentation click here.
  1. Download Software from Oracle Software Delivery Cloud:
    https://edelivery.oracle.com/
    • Search required media
      • In Product Pack select Oracle Database
      • In Platform select Linux x86-64
    • Download Media
  2. Hardware Requirements
    • 2 GB of RAM
    • A single hard drive with a minimum 125 GB of disk space
    • At least 1 Network Interface Card
  3. Installation
    • Boot the ISO image avs-installer-disc-12.1.2.0.0.iso
      Type install if you wish to skip a memory test
    • Sit back, have a coffee or tea and watch the Audit Vault Server being installed...


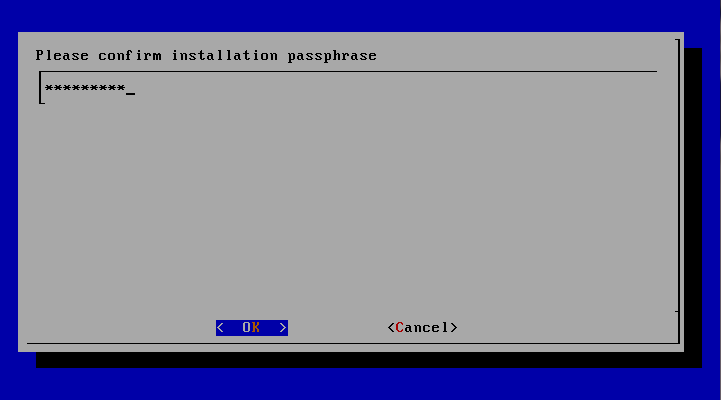
    • Enter Installation Passphrase (and confirm)


    • Network Configuration


    • Once the network configuration is complete the server will reboot
      The first boot will take a long time

    • Installation Complete
  4. Post Installation
    • To access the Audit Vault Server Post-Configuration page, open any internet browser and enter the ip address of the Audit Vault Server, in my case https://192.168.56.31 (see Network Configuration)
    • Click Proceed anyway (or similar). This is due to self-signed certificate.
       
    • Enter Installation Passphrase that you created during the installation
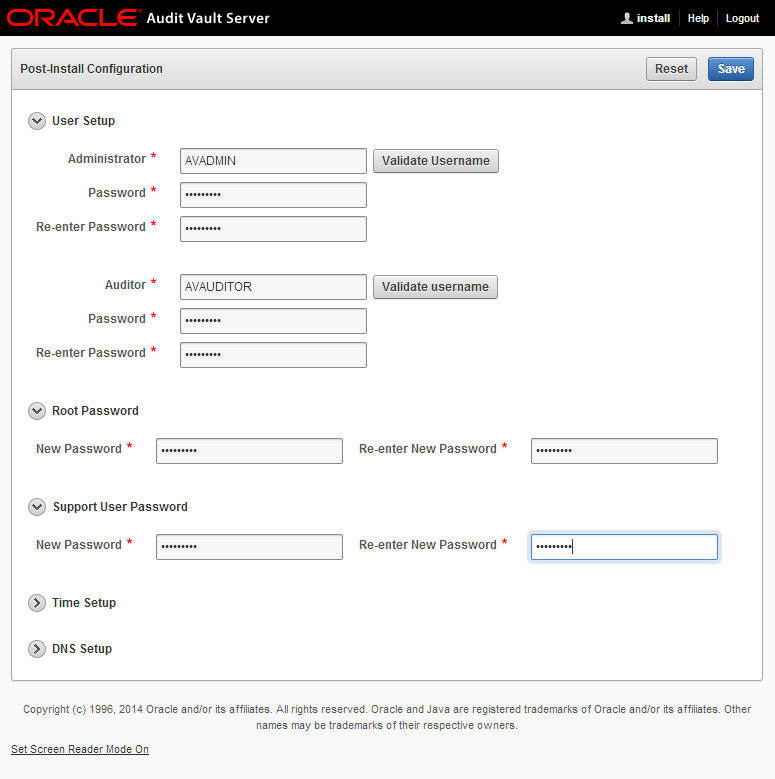
    • Set up usernames and passwords
    • First login
That's it really. As you could see the installation isn't really more than specifying the IP address and passwords.

Friday, May 30, 2014

Enable NTP Server in Windows 7

Hi folks,

I am using Oracle VirtualBox and I pause and resume my VMs with days between. However, a couple of my VMs cannot have Guest Additions installed and when I pause one of these VMs and wake it up again, its internal clock continues where it stopped when the host went down.

In order to have the clocks synchronized I have enabled the NTP server on my Windows 7 host machine and use NTP updating in my VMs. Since I've been looking for a while, until I found where to activate the NTP server on Windows 7 I will explain how to do it:


  1. Open the Registry Editor and browse to "HKEY_LOCAL_MACHINE\SYSTEM\CurrentControlSet\services\W32Time\TimeProviders\NtpServer"
  2. Change the value of "Enabled" to "1"
  3. Browse to "HKEY_LOCAL_MACHINE\SYSTEM\CurrentControlSet\services\W32Time\Config"
  4. Change the value of "AnnounceFlags" to "5" (it means to use local CMOS time clock, KB314054)
  5. Open "Services" and search for "Windows Time"
  6. Start "Windows Time" and set Startup type to "Automatic"
That's it. I hope this helps.

Regards,
Roy